Configure SAML IdP using OneLogin
Using SAML-based SSO, Single sign-on (SSO) lets users sign-in to all their enterprise (complete edition) cloud applications using their managed OneLogin account credentials. You can use both Identity Provider (IdP) initiated SSO, and Service Provider (SP) initiated SSO.
Configure SAML IdP using OneLogin
Settings Import and Validation
Configuring SAML IdP using OneLogin
- Once the prerequisites are done, you may need to purchase your own OneLogin tenant, like our wasptechnologies tenant shown in the image below.

- When you log into onelogin using your own tenant URL and if you try to use it immediately, you may get an error like the one shown below this in the settings.
Note: The email returned by OneLogin must match the email of the person configuring SAML Single Sign on during validation. The email returned by OneLogin must match the email of every user during registration and login as well. The email is used to find the Wasp user account during SAML login. If for any reason, like Active Directory synchronization, the email returned by OneLogin for a user changes that user's email in wasp must also be changed to match or the user will need to accept a new invitation and registration.
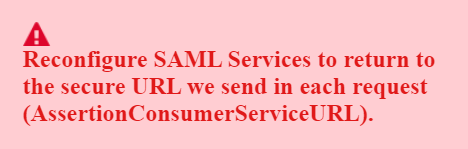
- The cause of the error is that you have not yet configured the application correctly in OneLogin.com. Without the application configuration, OneLogin.com doesn’t know that it is even allowed to respond to our queries, let alone how to respond.
- To let OneLogin.com know how to respond to our queries, you must configure your Wasp Tenant as a new application in OneLogin.com.

- We suggest using the SAML test Connector (Advanced). To find it, we suggest you use the application search feature.
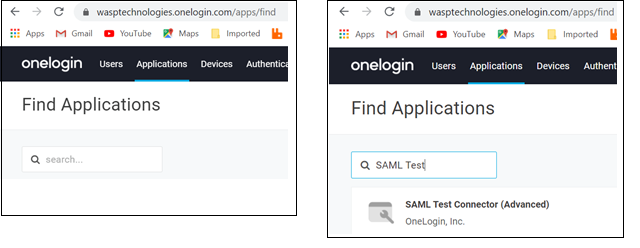
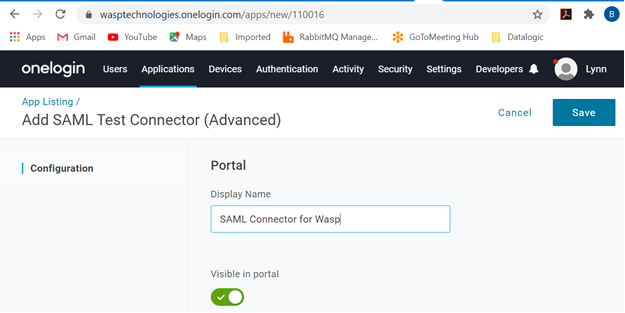
- Choose SAML Test Connector (Advanced). Enter a description. Click on the Save button.
Note: Create SAML Connector with SAML 2.0. The "SAML 1.1" will give an error.
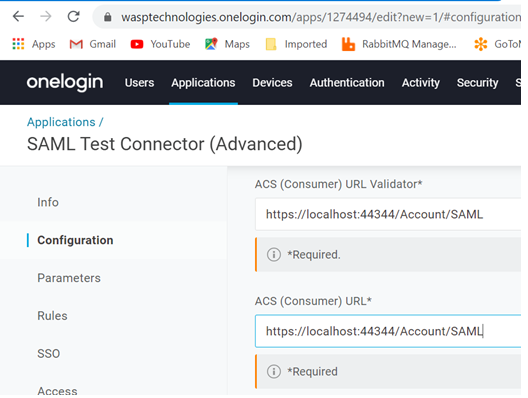
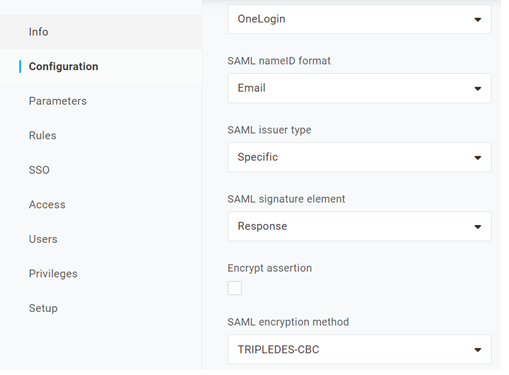
- After saving, choose Configuration and enter the URL that OneLogin should direct users to after they authenticate. You copied these values during the prerequisites step above. Paste the SSO URL into the ACS (Consumer) URL Validator field. Verify the full URL. It is your tenant URL with the path /Account/SAML - :https://yourtenant.waspinventorycloud.com/Account/SAML
This URL should be entered into the following fields: ACS (Consumer) URL Validator and ACS (Consumer) URL.
- The remaining default values are fine. Click Save.
- Select Rules and click on Add Rule.
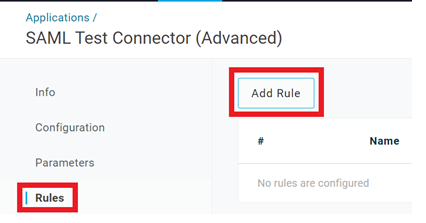
- Name this rule "Map LDAP parameters" because that is what should be happening. You should eventually set up your own Active Directory Connector to OneLogin and use that connector to synchronize LDAP parameters between your Active Directory and OneLogin.
Conditions are not required but the following three Action mappings are - NameID value to Username, User.Email to email and memberOf to member_of.

- Click on the Save button.
- The above rule should be good enough to get the OneLogin provider working for you if you have configured an Active Directory connector and it would work properly. If not, you can manually provide some of the values as follows. Under our application, select Parameters.
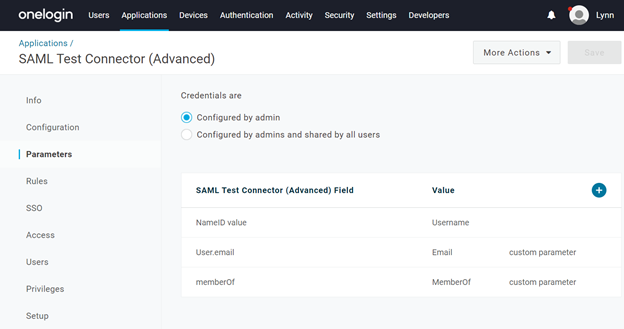
- Click on NameID to correct it, if it is not returning the username. As before, use the + button to add parameters for the User.email and memberOf fields.
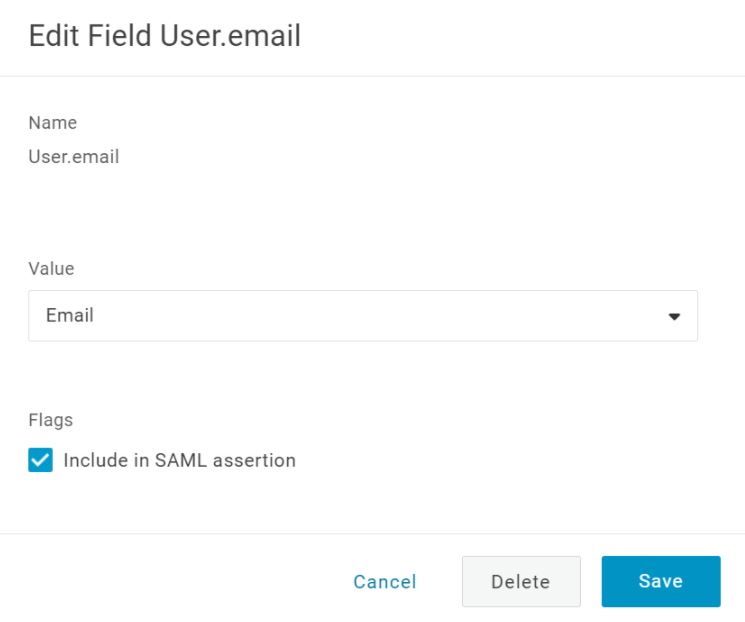
Note - Applications -> SAML connector -> Parameters - Make sure to check "Include a SAML assertion" for the User.email & memberof and SAML service providers must provide an email address for SAML authentication.
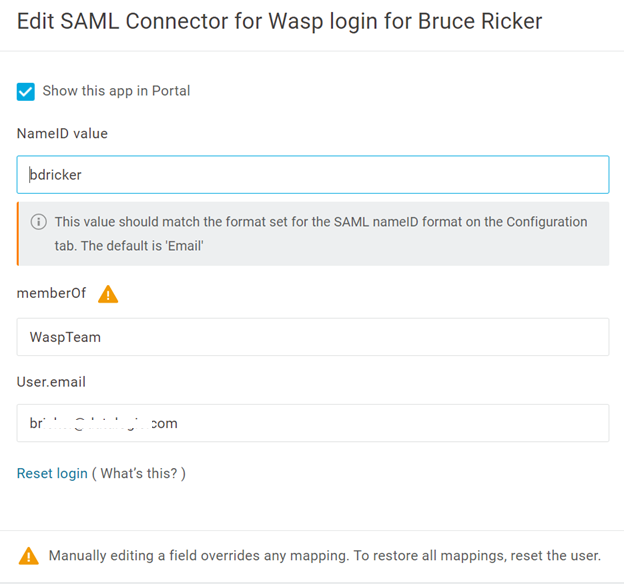
- Without Active Directory, you must also provide values for these fields. Edit your user account, select Applications, and click on the application we just configured.
- Enter any missing values and save your changes.
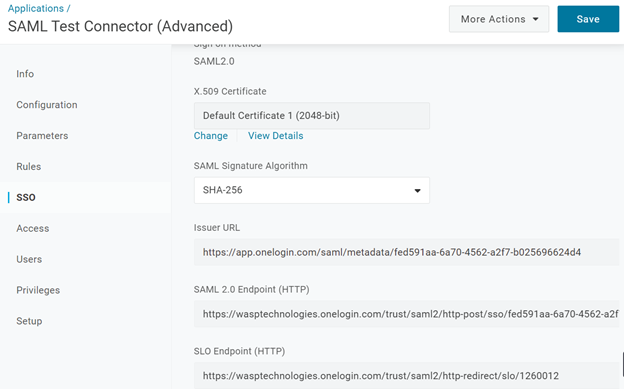
- Now that we have OneLogin configured with the correct values to send, we have to get the values for configuring Wasp. Edit the OneLogin Application and Select SSO. No changes are required, but you must download the configuration or copy some values from here into the Wasp SAML configuration. Leave the default for X.509 Certificate, make sure the SAML Signature Algorithm is at the very least SHA-256, and copy the following values. In our sample provider,
Important! Copy the Issuer URL below and paste it into any web browser. This will download a onelogin_metadata_XXXXXXX.xml configuration file. Save that onelogin_metadata_XXXXXXX.xml file for later.
https://app.onelogin.com/saml/metadata/fed591aa-6a70-4562-a2f7-b025696624d4
Note: Wasp does not support SLO Endpoint (HTTP). Wasp needs a minimum SHA-256, the Issuer URL, and the SAML 2.0 Endpoint (HTTP).
https://wasptechnologies.onelogin.com/trust/saml2/http-redirect/slo/1260012
- Save both values for later, using notepad for example.
- Click on the Save button.

- Saving the configuration will make the page reload, so click SSO again, and then under X.509 Certificate, click View Details.
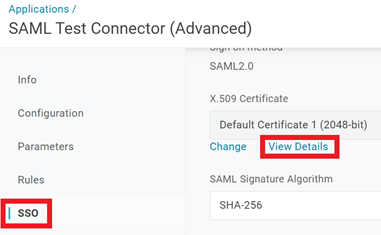
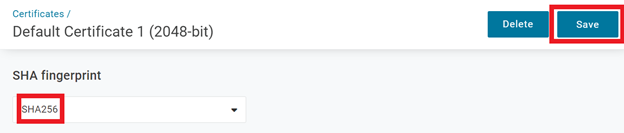
- We suggest you change the SHA Fingerprint to SHA256 and then save.
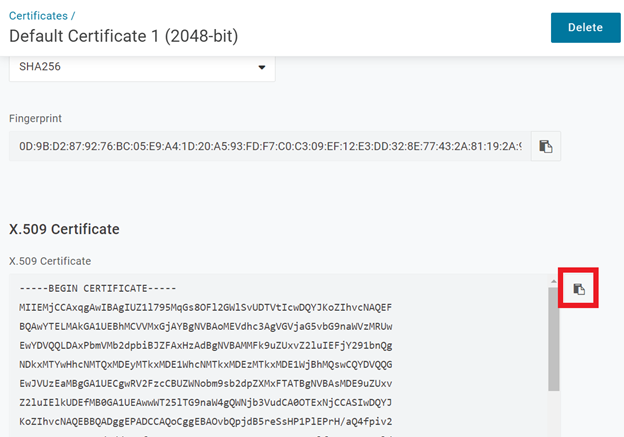
- If you did not download the metadata in the previous steps, after saving, scroll down and select the X.509 Certificate and select Copy to Clipboard icon and save the certificate in a safe place. This is the key information that helps secure communication between Wasp and OneLogin.
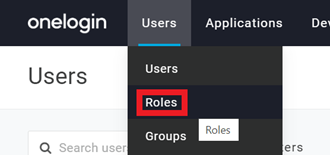
- OneLogin still needs one more configuration step. OneLogin supports multiple users using multiple applications, so you have to tell OneLogin which users may use your new OneLogin application. To do that, use Roles. If you have not yet done, go to the menu option Users > Roles.
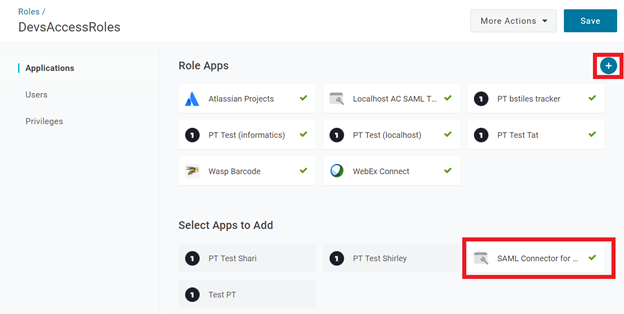
- Create a role if necessary, then click on the + button to add your new app to this role. When you click your new application, a green checkbox will appear in the app. Select Save and verify it.
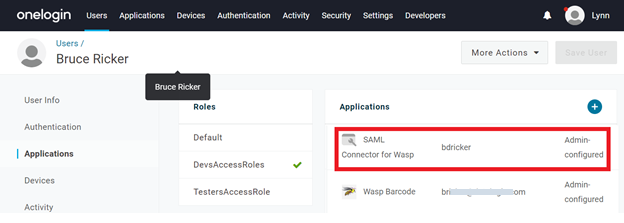
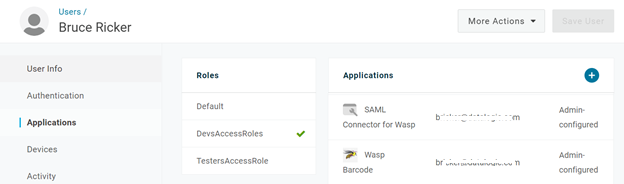
- One way to load users to a role is to edit the user and select applications. On this page, you can select the roles the user is in. Save any changes.
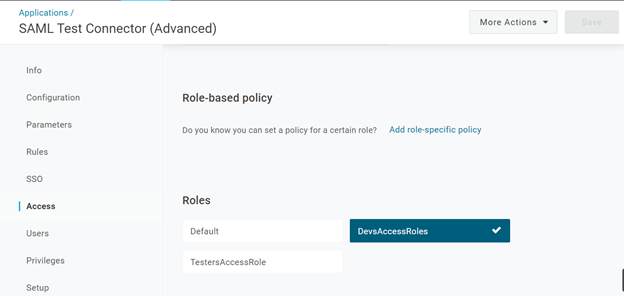
- To verify now that the user has access to the role, you can edit the Application we just created. While editing the application, it is also possible to select which roles have access to the application.
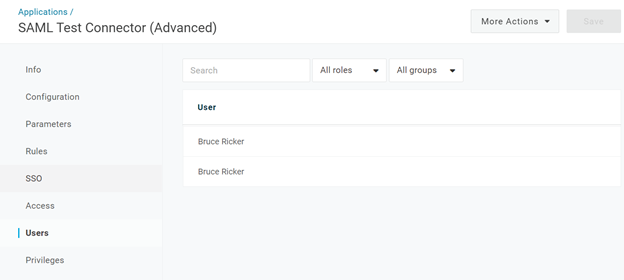
- To verify which users now have access while editing the application, select users. If the choices we made in the previous pages are correct, we should now see our user and all the other users in the roles to whom we granted access to our application.
- The last step in OneLogin is if you configured the App for a different OneLogin user record, you should send that user an invitation and log into OneLogin using that user account. If the user is configured to use several apps, you may need to choose the app you just created.
FAQs - Refer to Knowledgebase - Knowledgebase > FAQs.
- Wasp Cloud products: SSO setup with ADFS: Required fields, XML file, and other info
- Wasp Cloud products: SSO setup with Azure AD SAML: Required fields, XML file, and other info
- Wasp Cloud products: SSO setup with Google App SAML: Required fields, XML file, and other info
- Wasp Cloud products: SSO setup with Okta SAML: Required fields, XML file, and other info
Note: Use of the resources described here requires internet access.